Quality Photography Is the Foundation of Everything
Your work could be brilliant. Genuinely excellent. But if it's photographed on a smartphone in dim light with glare and wrong white balance, nobody will see it properly. A curator glances at that poor image and moves on. A collector sees the cast and glare and instinctively feels the work is "off" somehow. You sit wondering what's wrong with your art when the problem is entirely the photography. Almost seventy percent of rejected competition submissions fail because of photography, not because of the art itself. This is common. And tragic.
Quality photography isn't optional. It's foundational. Your portfolio, website, Instagram, competition submissions, catalogue, price list—all of it rests on this single element. Without it, nothing works. A stained-glass window without light tells you nothing. Similarly, your work without proper photography is invisible to the world.
Photographing at Home: What You Need
You don't need to hire a professional immediately. Spend a day or two learning, and acceptable results are within reach. Most emerging artists start this way. Only later, as their work prices rise and they need consistency across large bodies of work, do they move to professional photographers.
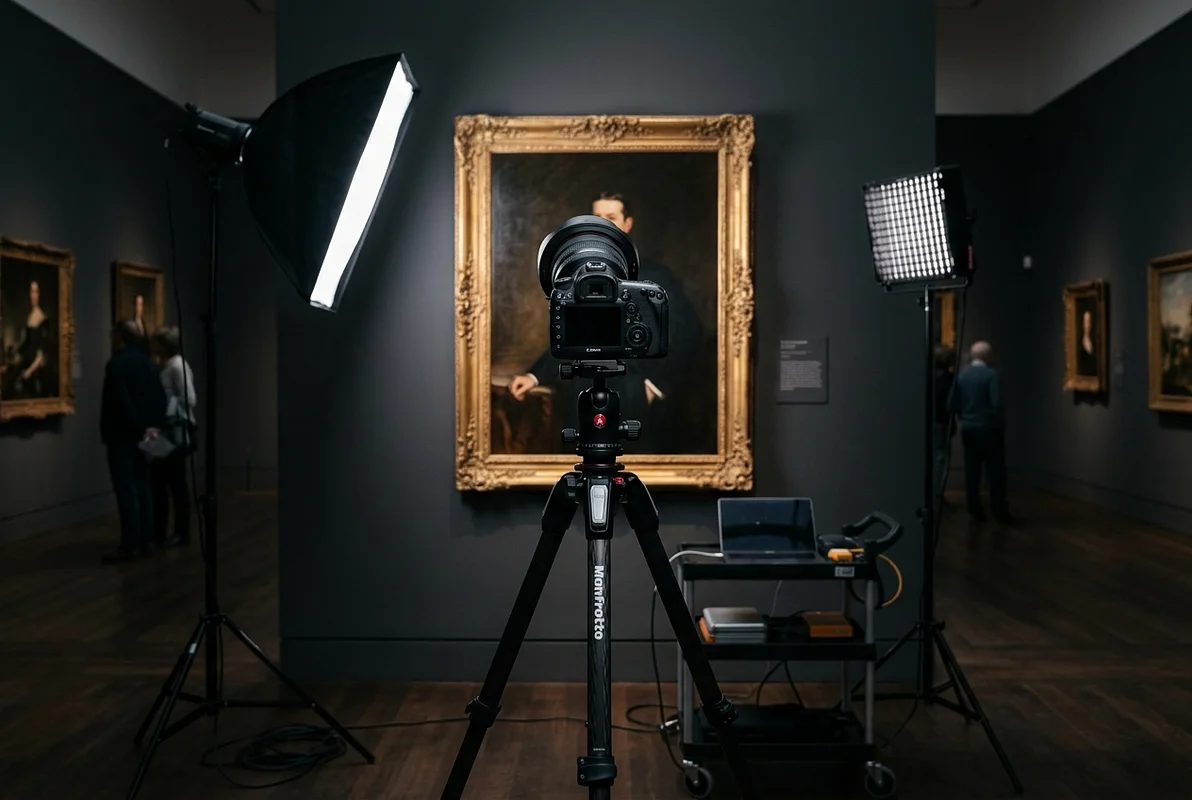
Lighting is eighty percent of the equation. It determines colour, contrast, detail, surface quality. Everything. Use two light sources positioned at forty-five degrees to your work, equal distance from the surface. Ideally studio lamps with softboxes—500W to 1000W bulbs provide sufficient intensity. The budget option works just as well: two quality desk lamps, white LED bulbs, 5000K colour temperature (daylight standard—critical for accurate colour rendition). Natural light from a window works beautifully on overcast days. Direct sun creates harsh shadows and blown highlights that obliterate detail. Never mix colour temperatures—an LED lamp plus window light confuses white balance and creates casts impossible to correct later. Position lights to the side and front at forty-five degrees. Never overhead, which flattens and distorts.
Background is everything. White or neutral grey, completely plain. No texture, no brickwork, no shelves. Your work alone in frame. If your walls won't cooperate, hang white paper or photography backdrop fabric. Inexpensive. Transforms everything.
Camera on tripod, always. Handheld shooting produces blur, and tiny movements compound. Position the camera directly opposite the centre of your work, at its middle height. The lens must be parallel to the work surface—otherwise geometry distorts and your square painting becomes a trapezoid.
Settings matter more than equipment. ISO as low as possible (100–200) to avoid noise. Aperture f/8–f/11 for maximum sharpness across the entire surface. Don't use f/2.8 or f/4—edges blur unacceptably. Shutter speed usually 1/60–1/125 of a second with good lighting. Set white balance manually using an 18% grey card (photographers' standard for accuracy) or use daylight preset and correct later in post-processing. Shoot RAW if your camera allows—vastly more flexibility for post-processing than JPEG. Ideally shoot RAW+JPEG simultaneously for backup and speed.
Smartphones: They Work, With Limitations
Modern phones produce decent quality with proper lighting. But the wide-angle lens distorts geometry. Straight lines curve. A rectangular painting becomes trapezoidal. Compensate by stepping further back and cropping afterwards. Never use digital zoom. Disable HDR mode—it changes colours and detail unrealistically, inflates brightness artificially. Use standard mode or Pro mode. Set white balance manually by pointing at a white object before shooting. Phone support or tripod is critical—tiny movements blur everything. Don't rely on your phone's LED light; it casts a yellowish tone you'll then need to correct.
Processing and Editing
Your photos should show your work as it actually is. No filters. No embellishment. Correcting white balance—yes, necessary. Slight adjustments to contrast and brightness—yes. Cropping to improve composition—yes. Filters, oversaturation, vignetting, background blur—absolutely not. A collector who buys based on an enhanced photo and then sees something different will feel betrayed. Won't trust you again. Reputation matters far more than one pretty image.
Use Lightroom for basic correction: white balance, exposure, contrast, saturation. Nothing more elaborate. If a work needs radical filters to photograph well, the problem is your shooting setup, not the work itself. Some artists, particularly those with vibrant colour work, adjust contrast and white balance—that's normal and acceptable. But increasing brightness by thirty points or completely shifting colour? That's manipulation, not editing. The line is real and collectors sense it immediately.
When to hire a professional? If you have more than twenty works worth several hundred pounds each, a professional will pay for itself after one sale. One quality photograph can generate commission enough to cover a full day's professional shoot. Look for someone who specialises in art photography, not portraiture. Portrait photographers don't understand what paintings and sculpture need. Art photographers know texture, depth, materiality. One day typically covers ten to twenty works and yields files you'll use for years. It's one of the best investments you'll make. Ask them explicitly to show your work truthfully—good light, accurate colour. Not filters.
Saving and Archiving
Keep all files. Original (RAW), processed version (TIFF), web version (JPEG). Multiple locations: local drive, external drive, cloud storage (Google Drive, Dropbox). Name them clearly: ArtistName_WorkTitle_Year_01.jpg. Five years from now, when you need that photograph for a museum catalogue or exhibition, you'll be grateful for this discipline. This system becomes invaluable.
Practical Steps This Month
If you lack quality photographs, prioritise this. Allocate a day. Find good natural light near a window or set up studio lighting. White or neutral grey background. Arrange your work. Experiment with angles and distance. Take a hundred photographs of a single piece if needed. Select the best ones. Process them minimally in Lightroom. Just basic correction. Get a critical eye to review. This is your first step toward a serious portfolio. If digital work feels daunting or time-consuming, ask a friend or hire a professional. It's an investment that will pay itself back multiple times over through improved submissions and sales.
Photographs as Cultural Intermediary
Most people see your work through a screen. Your photograph is often their only contact with it. A quality photograph says: this work deserves attention. A poor photograph says: the artist doesn't respect their own work enough to present it properly. Harsh but fair. Invest in quality—light, background, careful shooting, minimal but accurate editing—and results will surprise you. The transformation is real and immediate.
Investing in quality photographs is investing in visibility and success. One excellent photograph sells more than ten poor ones. This isn't hyperbole. It's documented fact across the art market.